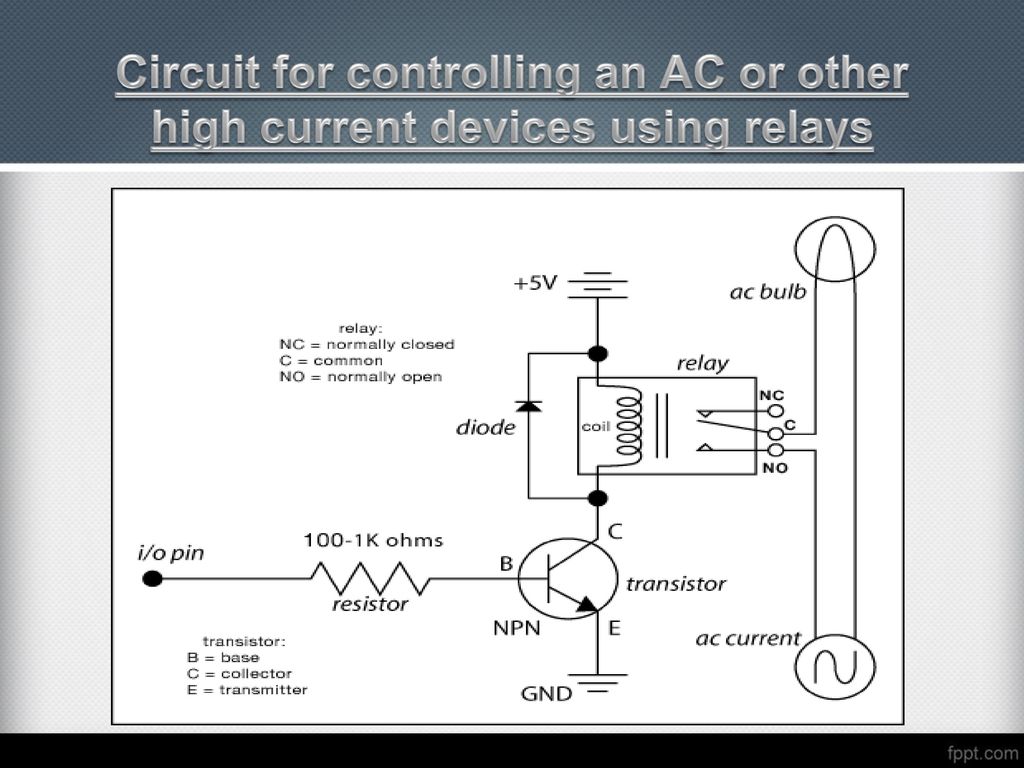
Overview guide Relays Device Help Circuit Diagram Instead, you use a low-voltage control signal from the Arduino to control a relay, which is capable of handling and switching high-voltage or high-power circuits. A relay consists of an electromagnet that, when energized, causes a switch to close or open.
This code is designed to control a relay, which in turn can control a high-voltage appliance (up to 250V) using a push button. The behavior is such that pressing and releasing the button once will turn the appliance on, and pressing it again will turn it off. This is often referred to as a "toggle" or "sticky" push button behavior.

Voltage Appliances with Arduino and Relay Module Circuit Diagram
Arduino Relay Tutorial for High Voltage Control. As with most things Arduino, we're going to need a little code and we'll need an input. While it's certainly feasible to do this project without any inputs (using a timer loop, for example), we're going to use a photoresistor. A photoresistor is a resistor that changes its resistance
It is much lower that the voltage that the lamp works with. We need a module to make it possible to control the high voltage/large current with Arduino. That is what a relay can do. The relay is an electrically operated switch, it acts like a soldier, accept low voltage signal commands for Arduino, and then control the high voltage gun on/off. Please click this link to see the full article: http://www.allaboutcircuits.com/projects/use-relays-to-control-high-voltage-circuitswwith-an-arduino/Circuits
Arduino Lesson 6 High Voltage Relay Circuit Diagram
Active LOW vs. Active HIGH Relays. Relay modules can be configured as Active LOW or Active HIGH, depending on their design.. Active LOW: The relay is activated when the control signal is LOW (0V). Active HIGH: The relay is activated when the control signal is HIGH (5V). To determine the type of your relay module: Check the Manufacturer's Datasheet: Look for the module specifications.